About Silk
No other fabric has fascinated man so continuously over millennia as silk. It is royal in its splendor, exotic and sensuous in its radiance. An aura of luxury has always surrounded and still surrounds, cloths made of silk. No other fabric drapes more beautifully or flatters the body more than silk. Silken shine, silken soft, and silken smooth – these epithets show that the queen of fabrics is a symbol of beauty, plain and simple.
Sericulture
Sericulture is an art of rearing silkworm for the production of cocoons which is the raw material for the production of silk. India has the unique distinction of being the only country producing all the five kinds of silk – Mulberry, Eri, Muga, Tropical Tasar and Temperate Tasar. But in Tamil Nadu, mostly mulberry silk is produced. The larva of mulberry silk moth, Bombyx mori, is a domesticated form which feeds on the leaves of Mulberry tree, Morus alba. The larva of mulberry silk moth grows for about 20-23 days feeding mulberry leaves. The fully matured larva spins to protect itself just before the pupa stage, a cocoon out of the most expensive and purest of threads, silk.
Sericulture Activities
Moriculture
Cultivation of mulberry plants is referred to as Moriculture. It is an agricultural activity. In Tamil Nadu, mulberry cultivation is mainly taken up in irrigated condition. Flat, deep, fertile, well drained loamy and clay loamy with good moisture holding capacity soil is ideal for mulberry cultivation.
Silkworm Seed Production
The silkworm seed production centers are referred to as grainages. The silkworm seed known as Disease Free Layings are prepared in their centers and supplied to the farmers for rearing. Both Government and private sector grainages are involved in this activity.
Silkworm Rearing
Silkworm Rearing is considered to be an agro based cottage industry since it involves mulberry cultivation. Silkworms are reared for the production of “cocoons” which is the raw material for silk production. The farmers rear silkworms and produce cocoons. By marketing the cocoons the farmers earn money. It is ideally suited for the rural areas of Sericulture States. Silkworms are reared in well ventilated rearing shed following shoot rearing method.
Marketing of cocoons
The farmers can sell the cocoon produced by them in the nearest Govt. Cocoon Markets. In the cocoon markets reasonable floor price is fixed by scientific methods and the final selling price is decided in the open auction. Here, silk reelers buy the cocoons produced by the farmers for producing silk.
Silk Reeling
Extraction of silk filament from cocoons by employing a set of processes is known as silk reeling. Presently silk reeling is done using three types of reeling devices viz. Charka, Cottage basins and Multi-end basins. Poor quality cocoons can be reeled economically on charka. About 50% of silk produced is of charka and about 35 – 40% is at cottage basins and a small quantity of silk is from multiend reeling.
Charka is a primitive device with which it is not possible to produce quality silk. Even though the cottage basin produces better quality silk compared to charka, it still falls short of gradable silk. Only with multiend reeling device gradable quality silk can be produced.
The most important version of silk reeling device is the automatic silk reeling machines which are popular in China and Japan. Now, steps are being taken to establish automatic silk reeling machines in TamilNadu.
The silk obtained out of the reeling process is referred to as “Raw Silk”. It is the silk reeled by drawing together the filaments from a number of cocoons (6 – 12) based on the thickness required for weaving sector.
Marketing of Raw silk
The raw silks produced by the silk reelers are marketed directly to the weavers or through Silk Exchanges functioning in the Sericultural States.
In the Silk Exchanges all the raw silk lots brought by the silk reelers are tested for quality. On the basis of quality of raw silk and the price prevailed in major marketing centre, floor price is fixed and then they are auctioned. The Silk Exchange enables the reelers to get immediate cash for the raw silk transacted by them.
Silk Weaving
The raw silk cannot be directly used for weaving. The raw silk is to be twisted before they are fed into looms. The operation of conversion of raw silk into twisted silk, is termed as twisting. The twisted silk is referred to as Ready Silk. Twisting is undertaken either by separate entrepreneurs or by the weavers themselves. The silk weaving is done either on handlooms or power looms. The traditional silk sarees and dhoties are made on handlooms whereas the printed sarees, dress materials, etc., are made on power looms.
Activities :
Mulberry Cultivation:
Climatic condition for Mulberry cultivation
The success of mulberry leaf production depends on three factors namely, variety, cultivation practices (agronomic characters like good rooting, fast growth, high yield, wide adaptability to environmental and soil conditions and resistance to diseases and pests are important with respect to leaf production which is the primary activity in sericulture) and plant protection measures. Beside that, climatic conditions are essential for the growth of mulberry. Different varieties require different climatic conditions.
1.Mysore Local or Local cultivar or Natikaddi
It is a low yielding variety known for its adaptability to low agronomic inputs and poor management practices both under rainfed and irrigated conditions. It is cultivated mainly in Karnataka.
2. Improved cultivar or Kanva-2 or K2 or Mysore5 or M5
It is an open pollinated hybrid (OPH) selection from the seeding population of Mysore Local variety. It grows vigorously and responds well to agronomic inputs. It can be grown under varied agro climatic conditions with suitable system of planting. It is cultivated in almost all the indian states and recently introduced to some south east Asian countries like Srilanka, Bangladesh, Philippines, Vietnam and Thailand.
3. MR2 (Mildew Resistant Variety –2)
This variety was developed by the TamilNadu Sericulture Department at their experimental station, Coonoor during 1970s. MR2 variety is resistant to powdery mildew disease caused by Phyllactinia corylea and is very popular in the plains of TamilNadu and better suited for high altitude areas also where high temperature prevails. This variety is good in rooting, leaf yield and growth. It is rated high for its nutritional level of leaves and hence susceptible for thrips attack. It yields 25,000 to 30,000 Kg leaf per hectare under irrigated conditions of TamilNadu.
4. High yielding varieties
To boost productivity of mulberry per unit area, experiments were carried out for evolving high yielding varieties at different sericultural research stations . A few such evolved varieties suited for irrigated conditions are already under cultivation and or field multiplication programmes namely, S13, S36, S54, Viswa (DD) and V1for irrigated conditions and S13 and S34 for rainfed conditions. They yields from 40,000 kgs to 60,000 kgs per hectare per year. Leaf yield of S13 is 18 tonnes / ha / year. Leaf yield of S34 is about 17 tonnes / ha / year.
Soils and Reclamation
Soil analysis is done in order to find out the quantity of essential nutrients available to plants and other relevant physical and chemical characteristics such as water retention, salinity, alkalinity, acidity, etc.’ which influence plant growth. For soil testing, only a very small quantity of the huge and vast soil mass in the field is actually used for soil testing.
Fertility rating of soil with respect to mulberry
pH
|
Electrical conductivity (dS/m)
|
Organic Carbon (%)
|
Available Nutrients (Kg/acre)
| ||
N
|
P2O5
|
K2O
| |||
Low <6.3
|
Normal <1.0
|
Low <0.5
|
Low<108
|
Low <9
|
Low <50
|
Normal 6.3-7.2
|
Critical
1.0-2.0
|
Medium
0.5-1.0
|
Medium
109-212
|
Medium
10-22
|
Medium
51-120
|
Moderately High
7.3-8.3
|
Injurious
>2.0
|
High
>1.0
|
High
>213
|
High
>22
|
High
>120
|
High
>8.3
|
-
|
-
|
-
|
-
|
-
|
Reclamation of Acidic Soils
Soil of very acidic nature is not suitable for mulberry cultivation. Soil becomes acidic because of its origin from material acidic in nature or due to excessive leaching of lime and other bases or continuous use of acid forming fertilisers like ammonium sulphate and urea. Acidic soils occur in the high rainfall areas.
Acidic condition of soil can be corrected by adding liming materials like dolomite, calcitic lime stones, burnt lime, Hydrated lime, lime sludge and slags, depending upon the availability. Ground limestone (Calcium carbonate) application is common.
The quantity of lime stone required varies according to the texture of soil and degree of acidity. For further requirement, we may contact soil-testing laboratories.
Reclamation of Alkaline soils
Alkalinity soil is due to the presence of salt (carbonates of calcium, magnesium and sodium) comparatively in high degree. They may be saline or saline-alkali or alkali depending upon the exchangeable sodium percentage. These soils usually occur in semi-arid and arid regions and the conditions are not ideal for mulberry growth. Generally they are deficient in nitrogen content, as the organic matter content is extremely low and the high pH and exchangeable sodium percentage cause reduction in the availability of plant nutrients.
Gypsum application is one of the common amendments used in reclamation of alkaline soils. Quantity of gypsum to be applied depends upon the extent of soil alkalinity, soil texture and the crop to be grown. Before gypsum application, it should be in powder form. Gypsum passed through 2 mm sieve has been found to be satisfactory. Application of gypsum broadcasting at 9 MT/ha followed by irrigation reduces the pH of red loamy soil from 8.55 to 7.45.
Instead of Gypsum, Plenty of good quality water has to be used for flooding and leaching the dissolved salt. Green manuring or straw as surface mulch is also recommended.
Reclamation of Saline soils
Saline soils are those which contain high quantity of soluble salts and show electrical conductivity above 4dS/m, pH below 8.5 and exchangeable sodium percentage of <15. High water table with high salt content, low rainfall and high evaporation rate, irrigation with saline water, poor drainage, use of salt producing fertilisers, etc., are some of the reasons leading to saline soil condition.
Reclamation of saline soil is aimed at bringing down the salt concentration step by step. This is achieved by a process whereby solutions of high salt concentration in the soil is displaced by less concentrated solution. Any practice that will reduce the upward movement of water and salt by reducing evaporation or by increasing infiltration will also enhance salt leaching and soil reclamation. Therefore, plenty of good quality water for flooding and leaching and use of surface mulches are recommended.
Use of Press Mud
Press Mud is a by-product of sugar industry. For every 100 tonnes of sugarcane crushed about 3 tonnes of press mud cake is left behind as by-product. It has been estimated that 2.7 million tonnes of press mud is produced every year in our country. Press mud contains trace quantity of micronutrients and prevents soil erosion, crusting and cracking, adjust soil pH, improves drainage and promotes normal bacterial and microbial growth in the soil. It is used as both soil reclamant as well as soil conditioner. Press mud is the most economic soil reclamant for red loamy soil. It should be broadcasted followed by ploughing and irrigation. Application of press mud at 40MT/ha is reported to reduce the pH of red loamy soil from 8.55 to 7.60.
Mulberry Varieties
The success of mulberry leaf production depends on three factors namely, variety, cultivation practices (agronomic characters like good rooting, fast growth, high yield, wide adapaptability to environmental and soil conditions and resistance to diseases and pests are important with respect to leaf production which is the primary activity in sericulture) and plant protection measures. Beside that, climatic conditions are essential for the growth of mulberry. Different varieties require different climatic conditions.
1.Mysore Local or Local cultivar or Natikaddi
It is a low yielding variety known for its adaptability to low agronomic inputs and poor management practices both under rainfed and irrigated conditions. It is cultivated mainly in Karnataka.
2. Improved cultivar or Kanva-2 or K2 or Mysore5 or M5
It is an open pollinated hybrid (OPH) selection from the seeding population of Mysore Local variety. It grows vigorously and responds well to agronomic inputs. It can be grown under varied agro climatic conditions with suitable system of planting. It is cultivated in almost all the indian states and recently introduced to some south east Asian countries like Srilanka, Bangladesh, Philippines, Vietnam and Thailand.
3. MR2 (Mildew Resistant Variety –2)
This variety was developed by the TamilNadu Sericulture Department at their experimental station, Coonoor during 1970s. MR2 variety is resistant to powdery mildew disease caused by Phyllactinia corylea and is very popular in the plains of TamilNadu and better suited for high altitude areas also where high temperature prevails. This variety is good in rooting, leaf yield and growth. It is rated high for its nutritional level of leaves and hence susceptible for thrips attack. It yields 25,000 to 30,000 Kg leaf per hectare under irrigated conditions of TamilNadu.
4. High yielding varieties
To boost productivity of mulberry per unit area, experiments were carried out for evolving high yielding varieties at different sericultural research stations . A few such evolved varieties suited for irrigated conditions are already under cultivation and or field multiplication programmes namely, S13, S36, S54, Viswa (DD) and V1 for irrigated conditions and S13 and S34 for rainfed conditions. They yields from 40,000 kgs to 60,000 kgs per hectare per year. Leaf yield of S13 is 18 tonnes / ha / year. Leaf yield of S34 is about 17 tonnes / ha / year.
Mulberry cultivation
In commercial cultivation, the mulberry garden is generally established through stem cuttings. However, due to variation in soil, moisture status, fluctuations in temperature and non-adoption of recommended methods of planting by farmers, the initial establishment is not always satisfactory having large number of gaps. As an alternate method, planting saplings instead of cuttings is found to be advantageous as it takes cares of variation in growth.
What is sapling?
Saplings are rooted cuttings and is used as planting material, the saplings of specific age, that is, 100-120 days for low or high bush and about 240 days for small trees are ideal. Because of well-developed root system, saplings get established quickly and grow vigorously.
Preparation of nursery bed
A flat land nearer to water source is preferred as nursery site. Well-drained land with loamy soil is ideal for nursery. The land must be ploughed or dug 30-40 cm deep and allowed for weathering in sun for 2-3 weeks. The land is again ploughed two or three times to bring the soil to fine tilth. Rootstocks, pebbles and weeds are removed at the time of ploughing and the land is leveled.
Preparation of cuttings
Plants selected for preparation of cuttings must be healthy and free from scale insect, tukra infestation etc., The shoots should be 6 to 8 month old and should have attained a thickness of 10 to 15 mm diameter. The stout lower portion and tender, green upper portion of the shoots are not fit to be used as cuttings. The middle portion of uniform thickness only to be used . Cuttings for raising 3 to 4 months old saplings are prepared. For raising 6 to 9 month old saplings, cuttings are made about 25 cm size. Sharp knife must be used to get clean-cut ends without damaging the bark.
Transportation of cuttings and storing
Cuttings are to be planted immediately after preparation. due to unavoidable circumstances, if mulberry cuttings have to be transported over long distance or stored for 2-3 days, the same should be done carefully so that the cuttings do not dry.
Planting
Nursery beds should be adequately watered and made wet one or two days earlier to planting. Mark each row at a distance of 20 or 30 cm as required, with the help of a thread. In each row by using a pointed stick, make small hole at 8 or 10 cm distance, to insert cuttings. To avoid fungal attack, cuttings may be dipped in 0.2 % Bavistin solution for 10 to 15 minutes. Cuttings must be planted in the hole in a slightly slanting position, bud pointing up, exposing only one bud above the surface of the soil. The soil around cutting must be pressed firmly, after planting.
Irrigation
One irrigation must be provided immediately after planting. Subsequently, irrigation is given once in 4 to 5 days in the case of sandy loam and red soil and once in 6 to 7 days in the case of black cotton or clayey soil.
Weeding
Nursery beds must be kept free from weeds. At least two rounds of manual weeding are required, first 25 to 30 days and second after 55 to 60 days of planting.
Fertilizer application
Chemical fertilizer must be applied in the nursery when saplings attain 20 to 25 cm height in about 55 to 60 days after planting, preferably after the second round of weeding. Following this. 500 g of ammonium sulphate or 250 g of urea can be applied per bed, followed by light irrigation.
Plant protection
The most common disease noticed in nursery is least spot. Application of 0.1 % Bavistin twice at an interval of 15 to 20 days is recommended. Spraying of 0.1 % Rogor to control thrips and 0.1 % Metasystax to control mites are also recommended in case such infestation occurs.
Uprooting, transporting and planting of saplings.
Three to four months old saplings are ready for transportation to establish bush system of plantation. For tree plantation or for raising high bush adopting wider spacing and high crown height, 5 to 6 months old saplings are used.
Two or three days before uprooting of saplings, nursery bed should be adequately watered for easy removal. Nursery bed should be adequately watered for easy removal. Nursery bed is loosened with the help of crowbar or guddali or pick axe to a depth of 30 cm and saplings are taken out one by one, without damaging the main roots. After uprooting sapling must be packed in bundles, covered with wet gunny cloth or green leaves and taken to the planting site during cool hours. Saplings must be planted immediately after uprooting.
Silkworm Rearing
Silkworm Races
The trend of sericulture development in India clearly depicts a quantum jump in mulberry silk production during the last three decades. Renditta (Quantity of Silk Cocoons required to produce 1 Kg of raw silk) in 1960 was as high as 16-17, which came down to 6-7 in 2010. This was possible mainly because of advancement and improvement in mulberry genotypes and cultivation practices.
Till recently, India had no system of authorisation of silkworm hybrids, which caused undue delay in release of breeds / hybrids evolved by the breeders with great caution. This also deprived industry from the benefits of having wider choice of silkworm hybrids for commercial exploitation.
Centrak Silk Board (CSB) has brought out a system of Auhorisation of silkworm races. The system involved 14 test centres spread in different regions of the country and test rearings are conducted twice in a year. Popular silkworm hybrids authorised by CSB for commercial exploitation and already in use are given in the following table.
Sl.No
|
Hybrids
|
Combinations
|
Season
|
States / Region
|
1
|
P2D1 x NB18
|
Mv x Bv
|
Winter
Spring
Summer/ Early autumn
|
A.P
W,B, Assam, Bihar, Orissa, Jharkhand,
M.P, Chattisgarh,
U.P, Uttaranchal
|
2
|
MY1 x NB18
|
Mv x Bv
|
Spring / Autumn
|
W.B, Assam, Bihar, Jharkhand, Orissa , M.P
|
3
|
N x (NB18 x P5)
|
Mv x Bv
|
Autumn
Summer/ Autumn
|
W.B, Assam, Bihar
Orissa, M.P, Chattisgarh
|
4
|
PM x NB18
|
Mv X Bv
|
Summer
|
Assam, Bihar, Orissa, M.P
|
5
|
RD1 x NB18
|
Mv X Bv
|
Summer /
E. Winter
|
U.P, Uttarnchal
|
6
|
BL23 x NB4D2
|
Mv x Bv
|
Spring / Autumn
|
Rainfed Areas of Tropics
|
7
|
BL24 x NB4D2
|
Mv x Bv
|
Spring / Autumn
|
Irrigated areas of Tropics
|
8
|
SH6 x KA
|
Bv x Bv
|
Spring / Autumn Spring / Winter
|
W.B, Assam, Bihar, Orissa, M.P
|
9
|
SH6 x NB4D2
|
Bv x Bv
|
Spring
|
U.P, Uttaranchal, J & K
|
10
|
CA2 x NB4D2
|
Bv x Bv
|
Sring
Spring / Autumn/
E. Winter
|
W.B, Assam, Bihar
Jharkhand, Orissa, M.P, Chattisgarh
|
11
|
NB18 x P5
|
Bv x Bv
|
Winter
|
Assam, Bihar, Orissa, M.P
|
12
|
YS3 x SF19
|
Bv x Bv
|
Spring
|
J&K, U.P, Uttarnchal
|
13
|
PAM101 x NB4D2
|
Bv x Bv
|
Autumn / E.Winter
|
J&K, U.P, Uttaranchal
|
14
|
CC1 x NB4D2
|
Bv x Bv
|
Autumn / E.Winter
|
J&K, U.P, Uttaranchal
|
15
|
PAM111 x SF19
|
Bv x Bv
|
Autumn / E.Winter
|
J&K, U.P
|
16
|
CSR12 x CSR6
|
Bv x Bv
|
Spring / Autumn
|
Temperate & Tropical Zones
|
17
|
CSR18 x CSR19
|
Bv x Bv
|
Autumn
|
Temperate & Tropical Zones
|
18
|
CSR16 x CSR17
|
Bv x Bv
|
Spring / Autumn
|
Temperate & tropical Zones
|
19
|
CSR3 x CSR6
|
Bv x Bv
|
Spring / Autumn
|
Temperate & Tropical Zones
|
20
|
CSR2 x CSR4
|
Bv x Bv
|
Spring / Autumn
|
Temperate & Sub-tropical zones
|
21
|
CSR2 x CSR5
|
Bv x Bv
|
Sring / Autumn
|
Temperate & Tropical Zones
|
22
|
KS01 x SP2
|
Bv x Bv
|
Spring
|
Temperate Zone
|
23
|
SKUAST-1 x SKUAST-6
|
Bv x Bv
|
Spring
|
Temperate Zone
|
24
|
APS5 x APS4
|
Bv x Bv
|
Spring / Autumn
|
Temperate & Tropical zones
|
25
|
APM1 x APS8
|
Mv x Bv
|
Spring / Autumn
|
Tropical zone
|
26
|
BL43 x NB4D2
|
Mv x Bv
|
Spring / Autumn
|
Tropical zone
|
Multivoltine x Bivoltine Silkworm Hybrids
In India, over 95% of the commercial silk being produced is from Multivoltine female x Bivoltine male parent (cross breed) and the existing cross breed Pure Mysore x NB18 / NB4D2 has some limitation specially lower shell wt. high renditta, low cocoon shell ratio and poor fibre quality
In order to overcome the limitations of PM x NB4D2, new hybrids involving multivoltine breeds have been evolved.
PM x CSR2 hybrid is meant for irrigated areas in all the seasons and is superior over the existing hybrid in yield, cocoon wt., Shell wt., SR%,filament length, raw silk %, neatness and renditta.
Silkworm Egg Production
Success of sericulture depends on quality silkworm eggs. Therefore, management of seed production, interalia transportation and incubation play important role on overall return. To produce quality seed, it is very important to adopt scientific methods of egg production right from seed crop rearing to egg incubation.
Disinfection of grainage and implements
The grainage rooms along with its appliances should be thoroughly disinfected prior to commencement of operation and kept ready to receive seed cocoons. A day before disinfection, the rooms and appliances are to be washed with 5% bleaching powder solution and the appliances are to be sun dried for 3-4 hours. A day after, the rooms and appliances should be properly disinfected with a mixture of 2 % formalin, 0.5 to 1 % lime and 0.05% detergent solutions. Room to be disinfected at the rate of 1 litter per square meter floor area.
Transportation of Seed Cocoons
The seed cocoons are to be always loosely packed either in perforated plastic crates or bamboo baskets and transported to respective destinations during cooler hours of day.
Pupal examination
Before selection of seed cocoons, it is very important to know the disease freeness of a lot, melt, filmsy and good cocoons are also to be separated. The gut portion is taken out and subjected to microscopic examination. In case there is incidence of pebrine, the lot has to be rejected. Before the arrival of new lots, it is very important and essential to disinfect the contaminated rooms.
Preservation and protection of seed cocoons
Immediately after the receipt of seed cocoons, they are to be spread on trays in a single layer to facilitate good aeration. Sorting of seed cocoons like melt, uziinfested, filmsy and those which are not conforming to the characteristics of parent races are to be taken out and rejected. The healthy seed cocoons alone should be preserved in trays for further processing. There should be cross ventilation in the preservation room, 25 +- 1o C temperature, 75 +- 5 % relative humidity, 12 hour light and 12 hour dark conditions to be maintained in the cocoon preservation rooms. Complete darkness to be maintained on the previous day of emergence , to avoid irregular emergence of moths.
Early eclosion / artificial eclosion / forced eclosion of moths
This helps in determining the disease freeness of a batch and helps in minimizing the loss to grainage.
Early moth eclosion box
A simple box made up of wood and plywood sheet with a glass door having dimension 90 x 75 x 60 cm is used. The bottom is fitted with asbestos sheet. A heating element is connected to the electric main through a thermostat (0 – 60 o C ). On the top of the box at the centre, a 15-cm diameter ventilator covered with wire mesh is provided. It is fitted with sliding top to regulate ventilation. At the bottom of the box and on the lower portion of sidewalls, small holes are drilled to facilitate aeration. For reading the temperature, a thermometer is fixed from inside of glass door. Within the box, a portion has been made to place 4-5 plastic trays in two tiers for keeping seed cocoon inside.
For early emergence of moths, 50-60 seed cocoons are taken from individual lots and placed into an artificial eclosion box. The temperature in the box is adjusted to 32-33 o C with the help of thermostat. This accelerates the development of pupae and moth emerges early. The early-emerged female moths of respective lots are taken and subjected for microscopic examination to know the disease freeness of lots.
Synchronization of emergence of moths, pairing, depairing and oviposition
Before the expected day of emergence of moths, the cocoon preservation rooms should be kept dark. In case of variation in development of male or female pupae, the development of male pupae can be arrested by preserving them at 5-7 oC and 75 +- 5 % relative humidity for 3-4 days. Only healthy and active moths are taken for pairing. After 1-2 hours of emergence, the male and female moths of respective combinations are allowed for 3.5 to 4 hours of pairing. At the time of depairing, the male and female moths are to be moved side ways so that the moths are separated easily without causing injury to reproductive organs. The matted female moth are taken in a separate container and induced for urination. Moths are placed on egg sheet and covered with cellules and kept in dark condition for oviposition. Under proper preservation (5-7 o C) male moths can be used for second pairing by giving 1-2 hours rest. Throughout the process of pairing, depairing and oviposition, optimum temperature of 25 +- 1o C and relative humidity of 75 +- 5 % should be maintained.
Surface sterilization of silkworm eggs
After ascertaining the disease freeness of layings, egg sheets are dipped in 2 % formalin for 10-15 minutes. This helps in removal of pathogens adhering to the eggshell and further prevents secondary contamination. Washing of eggs in formalin solution helps in firm adherence of eggs to the sheet.
Incubation of silkworm eggs
Incubation facilities uniform development of embryo. In addition, it greatly influences the voltinism of the eggs in succeeding generation, larval growth and success of cocoon crop. Therefore, the eggs are subjected to ideal conditions of incubation.
Optimum temperature of 25 +- 1o C and relative humidity of 75 +- 5 %, 16 hours of light and 8 hours of darkness are ideal. During the pinhead stage or before two days of hatching, the eggs are black boxed to aim at uniform development of embryo and hatching of larvae at a time on a single day.
Loose egg preparation
Loose eggs are getting popular for obvious advantages such as (a) standard / uniform egg number (irrespective of the race, season, zone) (b) increased egg recovery and (c) easy and better management.
Advantage of loose eggs
· Superior quality
· Uniform and known quantity irrespective of race / season / zone / grainage etc.,
· Enables scientific evaluation
· Increased egg recovery
· Increased hatchability
· Economical seed production
· Efficient surface sterilization
· Easy acid treatment of bivoltine eggs.
· Unfertilized eggs can be eliminated (in bivoltine only).
Disinfectants and Disinfection Methods
Disinfection is an integral part of healthy and successful silkworm rearing. It aims at the total destruction of disease causing pathogens. Several diseases caused by bacteria, viruses, fungi and protozoa affect the silkworms. These pathogens released by diseased silkworms easily accumulate and spread in the rearing environment through different routes. They are not easily destroyed and can persist / survive for long periods under congenial conditions. The spores of the pathogens, especially those of fungi are light and can easily be drifted by air current resulting in easy spread of diseases. There are no curative methods for any of the silkworm diseases and they are best prevented than cured. This is achieved by adoption of proper and effective methods of disinfection and stepwise maintenance of hygiene during rearing. To realize the benefit of disinfection (mass) and rearing at village or block level considering them as one unit.
Chemical Disinfectants available for use in Sericulture
Formalin
It is commercially available as 36% formaldehyde in solution form. A mixture of 2 % formalin + 0.05 % detergent is an effective solution that can be used for disinfection purpose as spray. Formalin is effective only in rearing houses, which can be made airtight and it is faster and more pronounced at temperature above 25 0 C and humidity more than 70 %.
Bleaching powder
It is white amorphous powder, with a pungent smell of chlorine. For effective disinfection, a high-grade bleaching powder with an active chlorine content of 30 % must be used. It should be stored in sealed bags, away from moisture, failing which it will be rendered ineffective. The action of bleaching powder is optimal under wet and contact conditions and therefore the surfaces of equipment and walls should be drenched with this solution. A 2% bleaching powder in 0.3 % slaked lime solution is used for disinfection as spray.
Slaked lime
A very useful bed disinfectant in sericulture. especially against viruses. It absorbs moisture and can be used to regulate bed humidity and maintain hygiene. Application of lime dust in combination with bleaching powder in and around rearing houses and premises improves hygiene in the environment.
Chlorine dioxide
Chlorine dioxide marketed as sanitech is an ideal disinfectant available at 20,000 ppm concentration is a strong oxidizing agent, effective at broader pH range and at 2.5 % concentration in combination with 0.5 % slaked lime is effective against all silkworm pathogens. It is stable and may be activated at the time of its use. it possesses tolerable odour and is least corrosive at the suggested concentration.
Material required for disinfection
Disinfectants, detergent, sprayer – Rocking or Power sprayer, buckets, measuring jar, weighing scales, gas masks, metal pans, room heaters, slaked lime powder, hand gloves and muslin cloth.
Technology for Prevention / Control of Diseases in Silkworm
The technology for prevention / control of diseases in Silkworm rearing is as sequential steps.
Cleaning of rearing house and appliances
(after completion of silkworm rearing and cocoon disposal)
Immediately after the disposal of cocoons, collect at one place inside the rearing house, all diseased and dead larvae, pupae, floss, left over mulberry, bed refuse, silkworm faeces, dust, dirt, etc., and disinfect by sprinkling 5 % bleaching powder solution and dispose off by burying at 2 ft.depth or burning.
Disinfection of rearing house and appliances
(with appliances inside the rearing house)
Measure the length and breadth of the rearing house including leaf preservation room, mounting room/place, etc., and calculate the floor area for disinfection
Estimation of the quantity of disinfectant required
The disinfectant required for disinfection of rearing house is 2lt/sq.m floor area or 185 ml/sq.ft. floor area.
To estimate the quantity of disinfectant solution required, multiply the floor area in square meter by 2.0 or the floor area in sq.ft. by 0.185 which gives the actual disinfectant required in litres for disinfection of inside of the rearing house.
Disinfection
Disinfect the rearing house using 2 % bleaching powder in 0.3 % slaked lime, 2.5 % Chlorine dioxide in 0.5 % slaked lime or 2 % formalin + 0.05 % detergent solution.
Disinfection of rearing house, appliances, etc., inside the rearing house
Spray using powerful jet sprayer, the required quantity of disinfectant
(@2.0 lt/m2 floor area of rearing house +25 % of disinfectant solution for appliances + 10 % for outside of rearing house) uniformly to drench all parts of rearing house inside appliances and outside. Keep the rearing house closed for a minimum period of 6 to 10 hours. After minimum period of 18-24 hours, shift the rearing appliances out of rearing house and sundry for 10 – 12 hours.
(@2.0 lt/m2 floor area of rearing house +25 % of disinfectant solution for appliances + 10 % for outside of rearing house) uniformly to drench all parts of rearing house inside appliances and outside. Keep the rearing house closed for a minimum period of 6 to 10 hours. After minimum period of 18-24 hours, shift the rearing appliances out of rearing house and sundry for 10 – 12 hours.
Silkworm rearing using the mulberry shoot do not require the rearing trays but uses the platform. Rearing trays are the main source of infectious agent and most difficult and expensive to achieve disinfection. To avoid this, changing over to rearing silkworm on shoot is advantageous. This method does not require additional disinfectant for appliances as only the rack and nylon nets are used.
Disinfection prior to brushing
Disinfection process should start 4-5 days prior to brushing. However, the eggs may be incubated in separate disinfected incubation room.
Five days before brushing
The rearing house and appliances are cleaned, washed in water. if trays and other appliances namely, basins, Vinyl sheet,leaf basket, etc., are used, conduct additional disinfection by dipping them in disinfectant or spraying disinfectant.
Dipping in disinfectant
Disinfect the rearing appliances that could be disinfected with 2 % bleaching powder in 0.3 % slaked lime solution by dipping them for 10 minutes in the solution in a disinfection tank. A tank of 2 feet depth and 4 feet diameter is suitable for disinfection. Prepare the disinfectant solution to fill half of the height of the tank. To determine the quantity of disinfectant solution to be prepared in the tank, calculate the volume of the tank using the formula 22/7 * r2 h (where r is the radius and h is the height of the tank)
Disinfection by spraying
Disinfection of appliances by dipping in disinfectant is the best method. However, where the facility of disinfection tank is not available, the following method is advised.
Disinfect the appliances using 2 % formalin + 0.05 % detergent solution or 2.5 % of Sanitech in 0.5 % slaked lime or with 2 % bleaching powder in 0.3 % slaked lime solution. Spray disinfectant @ 35 ml/sq.ft. surface area or 700 ml for a tray of 3.6 feet diameter. After the spray, put them together and keep completely covered with vinyl sheet for a minimum period of 6 hours. Disinfect the mountages also, following the above method.
Four days before brushing
Sun dry the appliances. If the prevalence of viral diseases (Grasserie and flacherie) were high during the previous crop, spray 0.3 % slaked lime in water
(3 g/lt) to the rearing house and appliances @ 2 lt/sq.m floor area + additional requirements. Sun dry the appliances after 1-2 hour of spray.
(3 g/lt) to the rearing house and appliances @ 2 lt/sq.m floor area + additional requirements. Sun dry the appliances after 1-2 hour of spray.
Three days before brushing
Conduct second disinfection of rearing house and appliances. Shift all the disinfected appliances into the disinfected rearing house and arrange in the room. Disinfect the rearing house and appliances by spraying 2 % bleaching powder in 0.3 % slaked lime solution or 2.5 % Sanitech in 0.5 % slaked lime or 2 % formalin + 0.05 % detergent solution. The quantity of disinfectant solution required is calculated and sprayed as per the first disinfection. After disinfectant spray, keep the room closed preferably for 24 hours. The second disinfection may follow the first if the gap between the two is not much.
Two days before brushing
Dust 5 % bleaching powder in slaked lime powder @ 200 g/sq.m at the entrance of the rearing house and the passage to it. Sprinkle water @ 1 lt/sq.m floor area. Open the windows of the rearing house and ventilate to drive off all the odour of disinfectant. Prevent contamination of rearing house and appliances.
One day before brushing
Arrange appliances for chawkie rearing and maintenance of hygiene. Keep the rearing room and mounting hall closed and open only one day before the larvae are to be shifted.
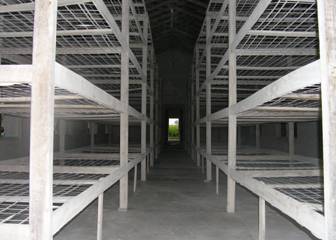
Rearing House
- A separate house is ideal for rearing of silkworm
- The rearing house should have sufficient number of windows to permit cross ventilation.
- Provision should be made to make it air tight for proper disinfection.
- Rearing house has to be built in such a way to provide optimum temperature of 26-28º c and RH of 60-70% for the growth of silkworm at minimum operational cost
Important principles
The most important principles to be remembered in silkworm rearing house are :
Avoid
* Damp condition
* Stagnation of air
* Direct and strong drift of air
* Exposure to bright sun light and radiation
Ensure
* An equable temperature and humidity
* Good ventilation.
The most important principles to be remembered in silkworm rearing house are :
Avoid
* Damp condition
* Stagnation of air
* Direct and strong drift of air
* Exposure to bright sun light and radiation
Ensure
* An equable temperature and humidity
* Good ventilation.
Features:
- Rearing house should be built depending on the brusing capacity and the method of rearing. The rearing area of 2 sq.ft/ dfl for floor rearing and 3 sq. ft/ dfl for shoot rearing is the general criteria.
- Rearing house should have a main rearing hall, an ante room (8 x 8 ft) and leaf preservation room. Maintaining a separate chawki room (a must for two- plot rearing system; rearing room of size 10’ x 14’ with a height of 9-10 ft for an acre of garden) ideal.
- Rearing house should face east-west direction.
- Rearing houose should have facilities to maintain the required environmental conditions.
- Growing trees around rearing house helps to maintain favourable environment
- Rearing house should be constructed taking consideration he following points such as effective is disinfection, washable floor, etc.
- 480 sq.ft area is required for rearing 100 dfls.
Preparation of rearing house
- Rearing room is to be kept ready after disinfection atleast 3-4 days in advance of commencement of rearing.
- Preconditioning of the rearing house is essential ie, arrangement of rearing appliances and provision of essential environmental conditions one day in advance.
Preparation for brushing
- Before commencement of each rearing, the rearing equipments and rearing houses must be thoroughly washed and disinfected with chlorine dioxide.
- Chlorine dioxide is sprayed on equipments, walls, roof and floor uniformly to destroy the disease causing organisms.
- The rooms should be kept closed for about 24 hours after disinfection.
- The doors and windows should be kept open at least for 24 hours before commencement of rearing to avoid traces of disinfectants.
- To disinfect rearing room and rearing appliances, chlorine dioxide can be used. 500 ml of chloride dioxide is mixed with 50 g of activator and this is dissolved in 20 litres of water. To this, 100 g of lime powder has to be mixed.
Rearing appliances


Non recurring (General)
- Disinfection mask and protective gum shes
- Sprayer for disinfection
- Room heater
- Water air cooler
- Kerosene blow lap
- Wet and dry thermometer
- 6” forceps
Non-recurring (specific)
- Egg transportation box
- Egg incubation chamber
- Loose egg incubation frame
- Black box
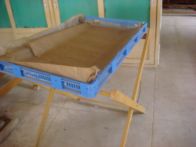
- Chawki rearing trays
- Rearing bottom stand
- Feeding Stand
- Ant wells
- Leaf chopping board
- Leaf chopping knife
- Leaf mat
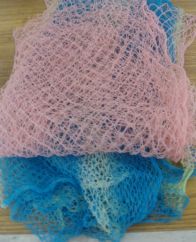
- Bed cleaning nets
- Earthen pot
- Litter basket
- Late age rearing trays
- Rearing stand
- Shoot rearing rack
- Chandrike
- Plastic basin
- Buckets
- Mug
- Plastic box
- Foam pads
- Foot rugs
- Leaf chamber for late age
- Leaf basket
- Cleaning nets
Recurring
- Paraffin paper
- Formalin
- Bleaching powder
- Lime powder
- Bed disinfectants
- Slides and cover slips
- Gunny cloth
- Cora cloth
Management of Silkworm Rearing, mounting & production of cocoon.
Silkworm Rearing: -
Silkworm is domesticated over thousands of years and the sole food for the growth of silkworm is mulberry leaf.
Climatic requirements: -
Under ideal conditions silkworm completes cocoon formation in 24-28 days from the day of hatching. However, there is variation in number of days due to fluctuation in temperature and humidity. As the temperature increases the development of larvae activates. The following required temperature/humidity/spacing should be provided:
S.
No. |
Stage
|
Temper-
ature 0C |
Humi-
dity % |
Spacing
(for 100 dfl’s) in Sq. ft |
1
|
1st Instar
|
26-28
|
85-90
|
4-14
|
2
|
2nd Instar
|
26-28
|
85-90
|
15-45
|
3
|
3rd Instar
|
25-26
|
80-85
|
46-90
|
4
|
4th Instar
|
24-25
|
70-75
|
91-100
|
5
|
5th Instar
|
23-24
|
70
|
181-360
|
The larval development will be maximum during the 5th Instar after 4th moult. Generally the moulting period delays due to fluctuation in climatic conditions. Temperature plays an important role in the development of larva. Larva under goes four moults in case of tetramoulters with in a span of 26-28 days to spin the cocoon.
Rearing shed: -
Rearing shed must be constructed with East/West direction, preferably with the thatched roofing, mud walls or any roofing must not reflect heat on the biological body growth of silkworm. Keeping good number of windows, proper ventilation, light, using country tiles for roofing will serve the purpose of maintaining required atmospheric conditions in the rearing house with reduced cost. The rearing house should have a good length of height and breadth.
Leaf quality: -
Quality of mulberry leaf in addition to proper maintenance of temperature/humidity plays significant role in the development of healthy silkworm.
Leaf quality plays an important role in the production of quality cocoons. The young age worms are fed with tender, succulent leaves which contain sugar, less amount of fibre, starch but, high moisture and protein that are suitable for chawki worms. Hence, the top tender leaves of mulberry plant are used to feed the young age worms. The late age worms are fed with matured leafs available at the bottom of the mulberry trees.
The leaf during its feeding time should not contain dust particles or water droplets on the surface of leaf. Disease attacked, wrinkled, weak leaves, poor quality leaves should not be fed to the worms. Feeding bottom matured leaves to chawki worms, tender leaves to mature worms should be avoided.
Preservation of Leaf:
Harvested leaf should be transported in wet gunny bags or baskets made up of bamboo. Such leaf should be preserved in a separate room or in a corner of rearing room or in specially designed leaf preservation chamber made up of wood with sufficient number of ventilators.
The leaf chamber should contain a good number of ventilators covered with wet gunny cloth. This will help in maintaining leaf quality. Other wise leaf should be scattered on the floor in a single layer so that the water droplets on surface of leaf will be evaporated. Leaf should never be preserved on heaps. This will increase the humidity. Leaf scattered on floor should be frequently sprinkled with water and tilted in summer.
Leaf requirement:
Silkworm attains nearly 10,000 times of weight starting from hatching to spinning stage, therefore, feeding quality leaf plays an important role in the development of silkworm.
Leaf Requirement (about 400 eggs per DFL’s)
S.
No. |
Silkworm Stage
|
Quantity of mulberry leaf
Required (approx.) (Kgs) |
1
|
1st Instar
|
2-4
|
2
|
2nd Instar
|
4-8
|
3
|
3rd Instar
|
30-40
|
4
|
4th Instar
|
80-90
|
5
|
5th Instar
|
600-650
|
The requirement of leaf will differ from race to race. The consumption of leaf also varies with season. During summer the quantity of leaf required will be a little higher since, drying of leaf will be faster hence additional feeding may be required.
Rearing Equipments:
The following equipments are required for silkworm rearing.
- Mesh 2) Formalin 3) Sprayer 4) Mats 5)Leaf preservation chamber
- Chopping board 7) Chopping knife 8) Chop sticks 9) Feathers
- Ant wells 11) Foam pads 12) Paraffin Paper 13) Hygrometer
- Thermometer 15) Bed cleaning net 16) Wash basin
- Plastic buckets/Mugs 18) Rearing stands 19) Rearing trays
- Feeding stand 21) Mountages
Disinfection:
Disinfection is a process of destructing the disease casual organisms. There is a possibility of carrying the pathogens or germs through the rearing equipment if there is any disease attack in the previous crop. Therefore, disinfection is necessary to protect the crop from disease attack. Before taking up rearing all the rearing equipments including the rearing house should be disinfected thoroughly. There are various methods of disinfection like physical and chemical. Physical disinfections are Sun drying, Steaming. In chemical disinfection, all the rearing equipment as well as the rearing house should be thoroughly disinfected with 2% formolin and dried.
Ultimate production of silkworm seed is to produce cocoons to get silk yarn. Advance planning, quality production, timely supply of seed are the critical factors in silkworm seed production.
The silkworm seed is produced in "Grainages". Grainages play a vital role not only in production of seed but also in the entire seed organization. During the Grainage operation one must know the seed suitability for a particular area before releasing commercially. A particular race is suitable to a particular area.
Hybrid varieties: -
CSR & TI have evolved certain high yielding varieties and recommended to different regions suitable for different seasons.
| S. No. | Hybrids | Suitable Season | Suitable Region |
| 1. | P2D1 x NB18 | Winter,Spring | Andhra Pradesh, West Bengal, Orissa, Madhya Pradesh |
| 2 | MY1 x NB 18 | Spring/Autumn | West Bengal, Assam, Bihar |
| 3 | N x (NB 18 x P5) | Autumn,Summer/Autumn | West Bengal, Orissa, Madhya Pradesh |
| 4 | SH6 x KA | Spring/Autumn/Winter | West Bengal, Orissa, Madhya Pradesh |
| 5 | CA2 x NB4D2 | SpringSpring/Autumn/Early Winter | West Bengal, Orissa, Madhya PradeshJ & K / Uttar Pradesh |
| 6 | PM x NB 18 | Summer | Orissa, Madhya Pradesh |
| 7 | NB 18 x P5 | Winter | Orissa, Madhya Pradesh |
| 8 | YS 3 x SF19 | Spring | J & K / Uttar Pradesh |
| 9 | SH6 x NB4D2 | Spring | J & K / Uttar Pradesh |
| 10 | PAM101 x NB4D2 | Autumn/Early Winter | J & K / Uttar Pradesh |
| 11 | CC1 x NB4D2 | Autumn/Early Winter | J & K / Uttar Pradesh |
| 12 | PAM111 x SF19 | Autumn/Early Winter | J & K / Uttar Pradesh |
| 13 | RD1 x NB18 | Summer/Early Winter | Uttar Pradesh |
Transportation of Eggs:
The required number of DFL’s should be collected from either Govt. Grainage or licenced Pvt. Grainage. The transportation of eggs plays an important role in the development of embryo and successful crop harvest. Therefore, the DFL’s are collected safely in a wet hand bag in the early morning or in the late evening. Care must be taken to not to cause any damage to the inside embryo. In case of loose eggs, the transportation box containing loose eggs should be covered with wet cloth, good aeriation must be provided to the eggs.
Care should be taken while transporting the DFL’s and should be kept under incubation at 250C temperature and 80% humidity. Egg cards should be spread in the rearing trays which should be kept in cooler places only.
Incubation:
The eggs should be kept in cooler places at 250C temperature and 80% humidity, lesser the humidity poorer the hatching percentage or more the temperature weak the larva and poorer the hatch percentage.
For uniform hatching all the egg cards or loose eggs should be kept in dark and cooler atmosphere. On the day of pin head or blue egg stage all the eggs are covered with a black sheet or kept in black box and known as black boxing. On the day of hatching all the eggs are suddenly exposed to bright light in the early morning at around 8 A.M. so that 95% hatching can be achieved. It should be ensured that hatching should take place uniformly. With proper maintenance of temperature and humidity development of larvae will be uniform.
Brushing: -
Brushing is transferring of newly hatched larvae into rearing trays. The newly hatched larvae after one hour of hatching get ready to feed on mulberry leaf. They are fed with finely chopped tender mulberry leaf. They are fed with finely chopped tender mulberry leaves. Chawki worms are fed with tender leaves with high moisture content. The brushing of newly hatched larvae can be done in various methods.
Newly hatched larvae can be covered with a net and chopped mulberry leaf can be sprinkled over the net. The larvae slowly crawls on to the net and start to feed on the mulberry leaf. Then transfer into rearing tray by gently tapping the net, this method is more convenient in case of the loose eggs.
In case of egg cards, the egg cards are placed in the rearing trays and chopped mulberry leaf is sprinkled over the newly hatched larvae, the larvae crawls on to the mulberry leaf later on the cards are removed.
Care should be taken not to touch the newly hatched larvae with hands while providing proper spacing, instead chop sticks are used to spread the worms in the rearing tray.
Feeding of Leaf: -
The leaf is finely chopped as per the recommended size and sprinkled on the larvae and after half an hour the newly hatched larvae slowly crawl on to mulberry leaf. Chopped leaf should be preserved from drying and loss of moisture content. For this purpose it should be collected in a basin covered with paraffin paper to protect from loss of moisture content.
First feeding to the newly hatched larvae should be given at 9 A.M. in the morning. During the 1st instar depending upon the silkworm strain and other factors (environmental conditions and leaf quality) the required mulberry leaf per 100 DFL will be around 2-2.5 kgs. The 1st instar stay for 3-31/2 days and under go moult. The moulting period last for about a day. This will depend upon the environmental conditions.
Gap should be maintained for feeding the worms before under going moult and immediately after moult. Generally two hours gap is given. Also over feeding should be avoided, especially before under going moult which will result in wastage of leaf.
Spacing: -
Larval growth will be very fast in the silk worms during the early stages. Too much crowd in the rearing tray results in increase in humidity, heat, fermentation of litter which results in un-hygienic conditions, wastage of leaf and under development of silkworm. The number of trays and space required for each instar will increase.
| Stage of silkworm | No.of trays required for 100 DFL’s (Diameter of tray 3 ½’) |
Space required
(Bi and Multi x Bi hybrids) | ||
Beginning
|
End of stage
|
Begin
|
End
| |
1st instar
|
2
|
2
| 4 to 15 Sq.ft | |
2nd instar
|
2
|
5-6
| 15 to 45 Sq.ft | |
3rd instar
|
5-6
|
10-12
| 46 to 90 Sq.ft | |
4th instar
|
10-12
|
20
| 91 to 180 Sq.ft. | |
5th instar
|
20
|
40
| 181 to 360 Sq.ft | |
Spacing should be given simultaneously at the time of bed cleaning or feeding and care should be taken not to disturb the worms very frequently.
Bed Cleaning: -
Silkworm after moulting leaves the exuviae. All the leaf fed to silkworm may not be consumed. Dried leaves, rejected leaf in the bed, silk worms excreta, dead worms, diseased larvae all will increase the humidity, fermentation, temperature in the bed. If proper bed cleaning is not done in time it leads to various complications viz. Ill health of larvae, disinterest of the larvae to fed due to unhygienic conditions, ultimately worms becomes weak.
Bed cleaning in silkworm rearing tray is done by various methods like using of paddy husk, straw, and bed cleaning net. During 1st instar bed clearing should be done once during pre-moulting, during 2nd instar – twice, once after moult and before next moult. During 3rd instar thrice i.e. after moult, before next moult and once in the middle. During 4th and 5th stage once in a day in case of shelf rearing. However, in case of floor rearing or shoot rearing once in each instar.
Feeding:
Not only the nutritive value but also the number of feeds in each instar plays a major role in the cocoon built. Three to four feeds are given to the silkworm. In a day the last feeding i.e., during the night should be a little more since the duration for the next feeding will be longer. During moulting period no feeding should be given. Before settling to moult and immediately after moult, first feeding should not be heavy. Feeding tender leaves to young age worms is essential. As the larval growth advances the mature leaf can be fed.
Maximum leaf is consumed during 5th instar only. During this stage only the maximum growth of silk gland can be noticed. It is estimated that 50% of the total weight will be increased in the 5th instar itself. The feeding schedule is: -
S.No.
|
1st feeding
|
2nd feeding
|
3rd feeding
|
4th feeding
|
5th feeding
|
1
|
6 A.M.-6.30 A.M
|
11-11.30 AM
|
3-3.30 PM
|
7-7.30 PM
| |
2
|
7 AM – 7.30 AM
|
11-11.30 AM
|
2-2.30 PM
|
5-5.30 PM
| |
3
|
6 AM – 6.30 AM
|
10-10.30 AM
|
2-2.30 PM
|
6-6.30 PM
|
10-10.30 PM
|
More number of feedings are given during summer since moisture content in the leaf will not be sufficient during summer and leaves will dry very easily.
Types of Rearing:
Rearing of silkworm is done in various methods in different areas. Mainly the rearing of silkworm is of two types
a. Chawki Rearing:
Rearing of young age silk worms is called Chawki rearing. Here worms are reared upto third moult and distributed to the rearers for late age rearing. Chawki rearing in mass at each CRC will not only control the attack of diseases but also facilitate the rearing on most scientific lines and cost wise it is most economical. To maintain coolers, heaters, exhaust fans, etc., by individual rearers is a costly affair, however, all these facilities can be maintained in Chawki Rearing Centres.
b. Late Age Rearing:
Late age rearing after third moult does not require high temperature and humidity compared to chawki rearing. Late age rearing is a little easier process than chawki rearing. During late age the quantity of mulberry leaf required is more than 90% of total larval period. During 5th stage particularly the larvae eat voraciously worms feel maximum appetite larvae loses water from its body hence, less temperature, low humidity, good ventilation is required.
Mounting:
This is the last stage of rearing operation. At this stage silkworm becomes matured completely and ready to spin into cocoon. These silk worms after 5 days of 4th moult becomes yellowish and translucent, stops feeding on mulberry leaves, starts to search for a corner and try to crawl on the feeding trays further liquid like substance oozes out of the mouth from the spinneret. These movements clearly indicate to transfer the mature larvae into the mountages.
Transferring of matured silkworm on to the mountage or cocoon frames is called "mounting". This is an important and skilled operation. Any deviation in identification of maturity of worms adversely effect on cocooning.
During mounting though, selection of ripen worms is not a difficult task, but, due care is needed. Most of rearers pick up ripen worms with hands to transfer them on to mountage. This is the most common method used in our country, however this is laborious and due care is needed while handling the mature worms. A few rearers use rearing nets, in some parts, rearers use mulberry branches to separate the matured worms. As the matured worms stop feeding they crawl on to the twigs searching for a support to spin the cocoon.
Another method called frame method is also used, fresh mulberry leaf is applied with a frame, matured worms crawl above the frame which are picked up and tranferred on to the mountages. While mounting care should be taken to avoid over crowding. Proper spacing should be given to avoid formation of double cocoons strained cocoons/urinated cocoons. For the purpose the density of worms in the mountage should be limited to 40-50 worms per sq.ft.to avoid formation of double cocoon, stained cocoon. However, the number of worms in each mountage depends upon the size of mountage and type of silkworm race.
The matured worms picked up in any of the methods mentioned above are transferred to the mountages. In an area of 1 mt 800-900 worms can be mounted to avoid too much density in the mountage. Mountage should be kept in inclined position so that, excreta of worms fall on ground.
In certain strains of silk worms around 250-300 worms can be conveniently mounted in a standard mountage of 90 x 60 cm size. However the size of mountage varies from place to place. In case of bamboo made chandrike that has a mat on the back ground of size 6’ x 4’, it easily carries above 1000 worms.
During mounting care should be taken to use the right type of chandrike in convenient size and shape. There are different types of chandrike that are used for the purpose of mounting.
- Plastic mountage
- Bamboo made chandrike
- Straw mountage
- Bottle brush
- Revolving mountage, etc.
Cocooning:
The matured silkworm spins the outer protective covering called cocoon and remains in dormant stage inside as pupa.
After mounting the ripen worms in chandrike the larvae sticks on to the mountage by oozing out the silk fluid which will harden immediately after coming in contact with air and sticks itself to the mountage. It starts to ooz out the silk by continuous movement of its head in a very specific manner to form the silk filament in the shape of arithmetic figure `8’.
Larvae moves its head continuously about 70-80 times per minute till the compact shell called cocoon is formed and detaches itself from the last layer of silk of then transforming into pupa. The Cocoon will have three layers.
- Outer floss
- Middle compact layers
- Inner pelade
The outer floss layer which will be 8-10% of weight of cocoon though formed of a continuous filament, is not reelable. The floss percentage varies from race to race. The middle order compact layer only is reelable and is a continuous filament easily reelable and the inner pelade layer is not reeled.
Silkworm completes the spinning in 2-4 days depending upon the silkworm strain and climatic conditions provided.
Harvesting of Cocoons:
Harvesting of cocoons is done on the fifth day of spinning. Whereas seed cocoons should be harvested on eighth day or ninth day of spinning depending upon atmospheric temperature.
Harvesting should not be done immediately after pupation. Further, harvesting should be done before the moth emerges out. Too many days delay in harvesting will result in formation of pierced cocoons due to emergence of adult moth or uzi maggots.
Cocoons are harvested generally with hand. In advanced temperate countries like Japan simple devices are used to harvest the cocoons from rotatory mountage.
কোন মন্তব্য নেই:
একটি মন্তব্য পোস্ট করুন